9/28/20 - art
by Daniel Devlin
Posted in: art, I AM STILL ALIVE 2020, people, portraits
I AM STILL ALIVE 28.9.2020
ONE SELF PORTRAIT EVERY DAY in 2020 : 272
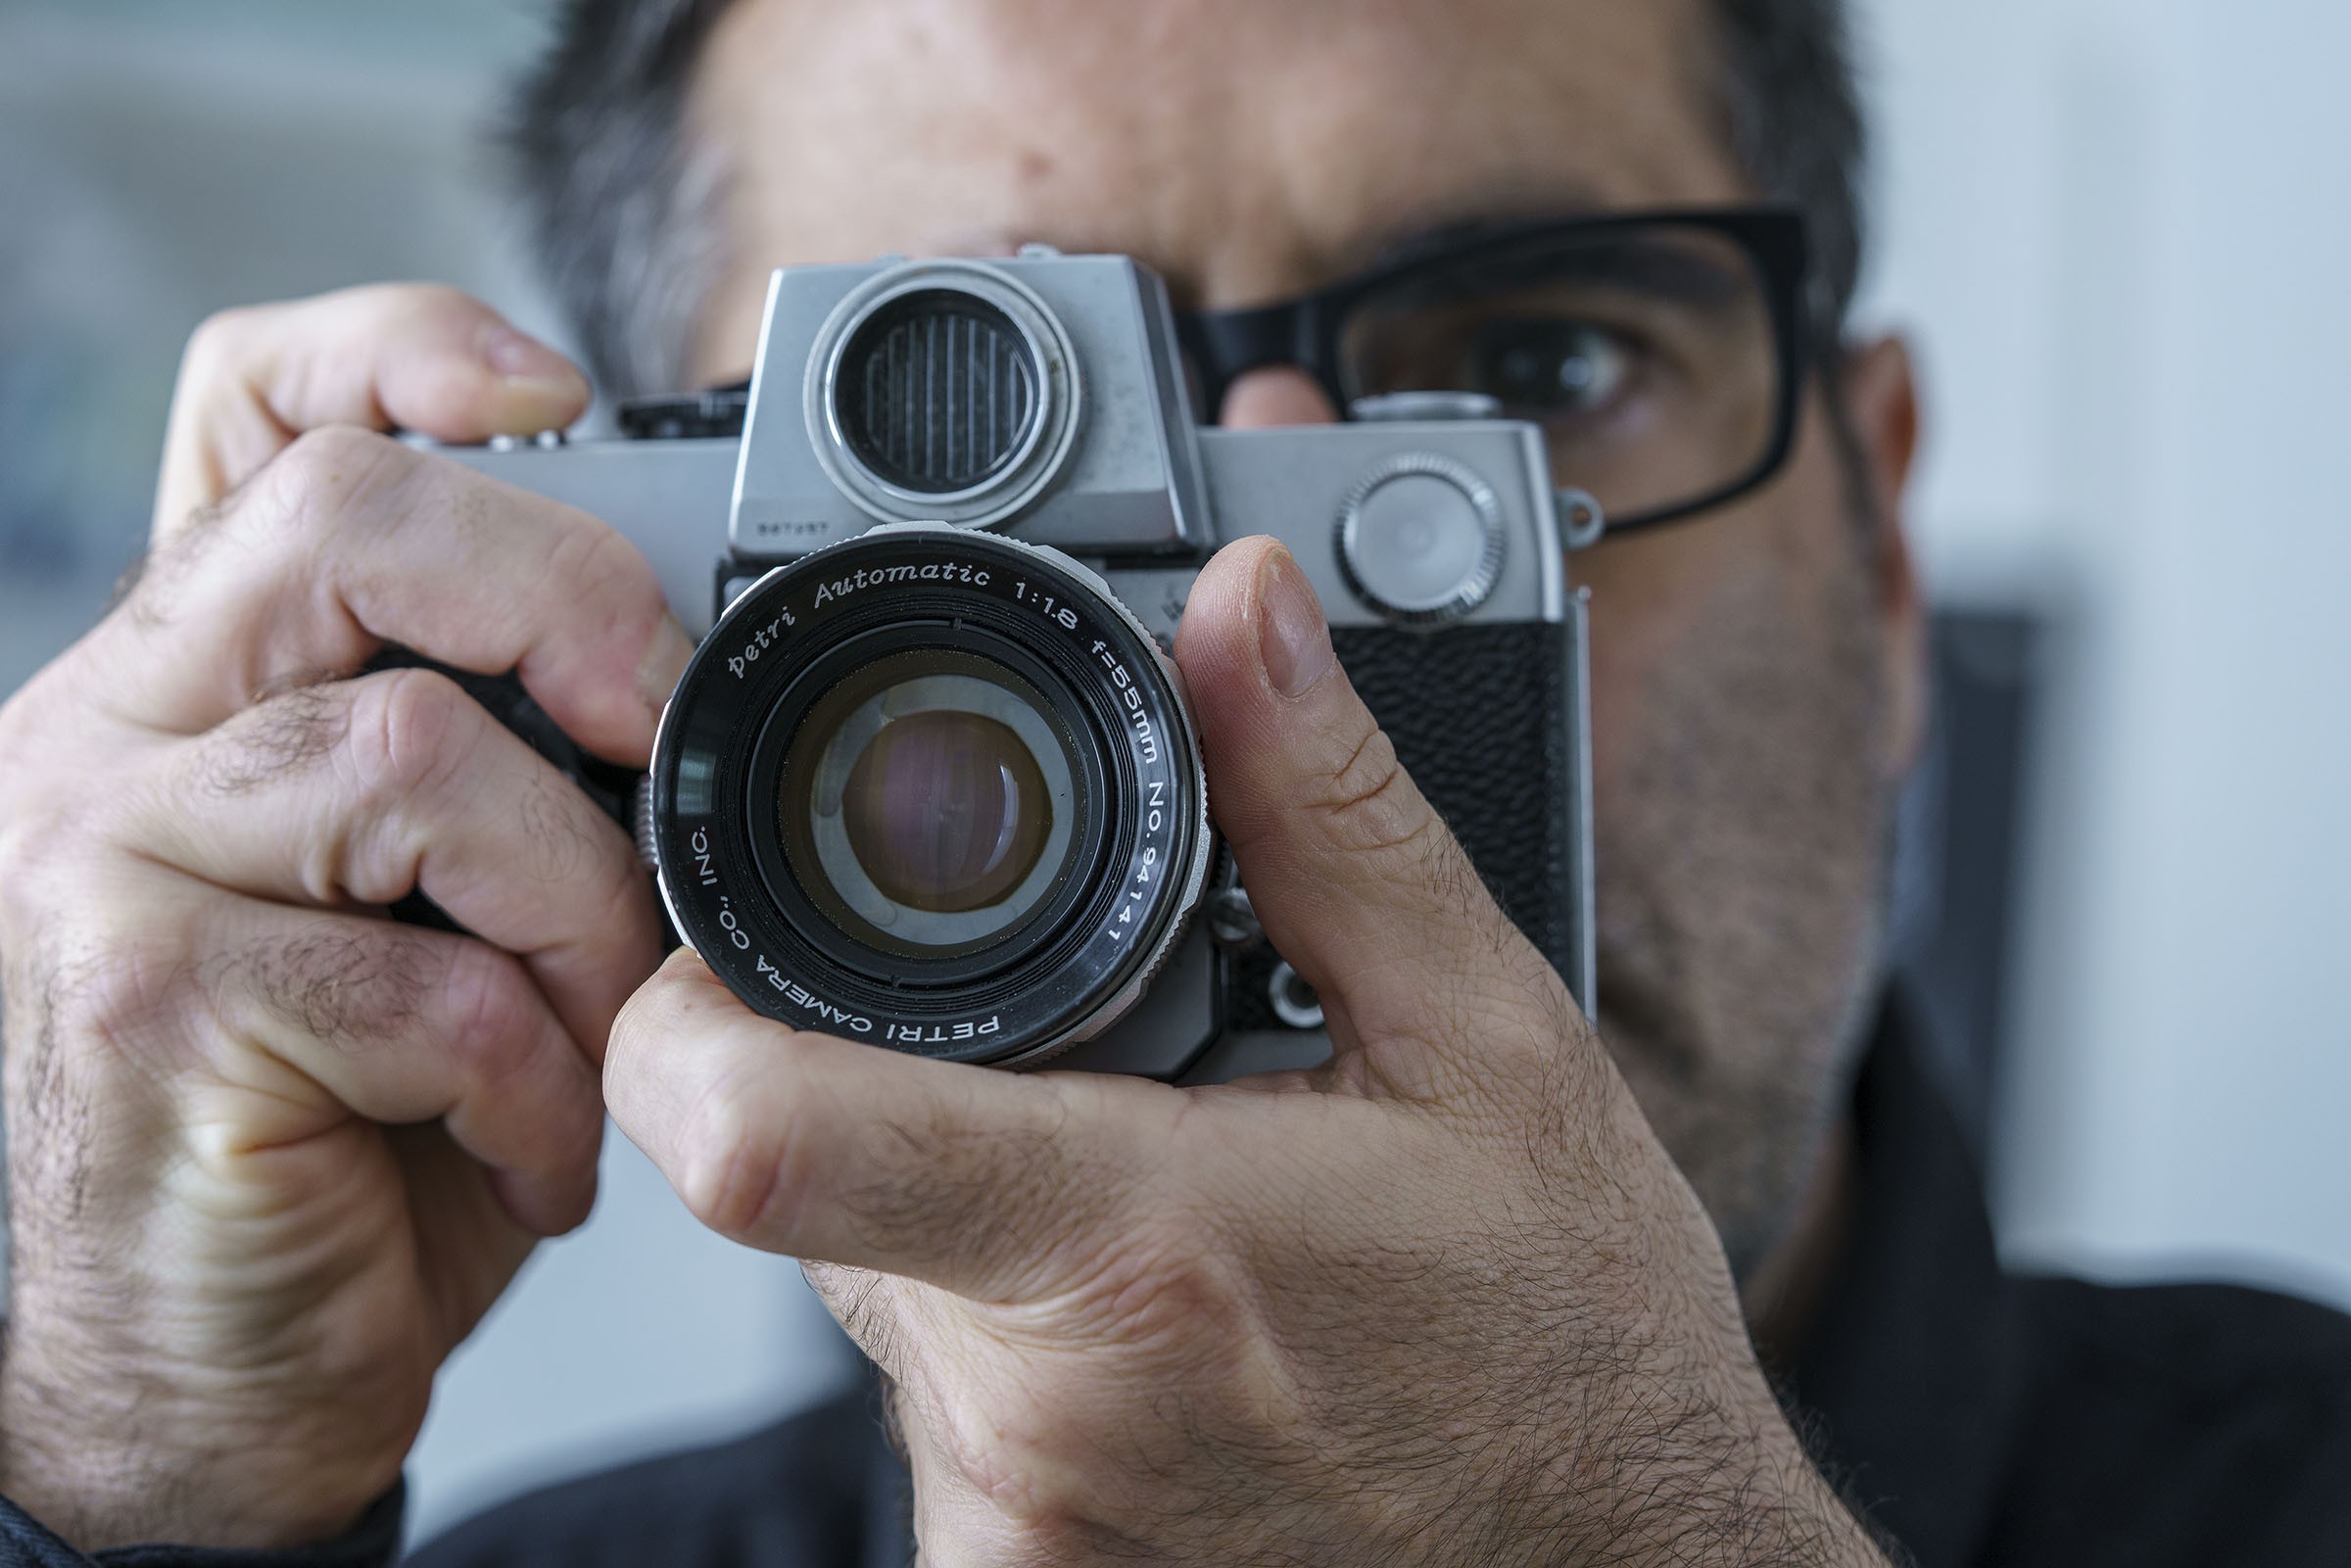
Here’s a self portrait with PetriFlex 7. This self-portrait a day in 2020 is sometimes quite hard work because it requires posting a photograph every single day, even on days I am lacking ideas or inspiration or on days when I’m feeling low and thinking “who cares” but I know that I will feel positive and inspired soon so I just take a quick picture of me looking grumpily at the lens and post it. These uninteresting photos are as important as the most interesting ones as, in my mind, this project only works if I stick to the rules I have set myself. These (eventual) 366 photos will altogether be a complete self-portrait which will include inspired days, good days, normal days, boring days, not so good days and bad days.
I got sidetracked a bit, I wanted to talk about why I own a PetriFlex 7 camera (I love the look of it, with its …
[“EMIL, what’s the name of that Greek giant with one eye in the middle of his forehead?” “Polyphemus, why do you need to know?” “Thanks, I’ll tell you later”]
Polyphemus eye which I think serves as a light metre).
A few years ago, maybe 5? I started a project which sort of fizzled out after the first 4 photos because it was too laborious. I bought many cameras on eBay, they usually were sold as “spare or repair” as the maximum price would have to be £10 including shipping (sometimes got carried away and went slightly over). I would then take portraits of people holding a camera they got to choose from my collection of most probably not working cameras.
I would take these portraits with a digital camera, print a negative on a A3 film with an inkjet printer and then then contact print in a darkroom. The result was quite beautiful as you had the detail of the digital photo combined with the grain and quality of a darkroom print. It’s actually not as simple as that, the sensitivity of photographic paper is very different and if you us a negative done in photoshop you just get a completely black print. I spent about six months working it out, I would get tips from other people on the internet, for example, normal transparent film for inkjet would not be able to hold enough ink to be opaque enough, I found out that the only transparent film that could hold enough ink was a Japanese film called Pictorico which, in Europe, was only available from a distributor in Holland. Its slightly opaque like tracing paper and on one side has a texture similar to paper so ink can stick to it instead of sliding off. I am getting a bit too boring now but I want to say that I spent six months working out how to do it. I would prepare different photoshop curves to apply to my test image and then print the negatives on Pictorico, then go to the darkroom and test it on different papers with different exposure using different developers. Part of my test image would be a series of square going from 5% black to 100% black in 5% increments. At home I would compare my darkroom print with my digital print and see if there were any squares that didn’t come up right and would then tweak my photoshop curves accordingly, print some new acetates which I would test the next time I had time to go to the darkroom.
Eventually, I cracked it: I had two photoshop curves which worked (with different types of contrast), I knew what paper and developer to use and had a pretty much good idea of what exposure to start with. Oh, I forgot, each portrait I did would have the previous print in the background so that the second portrait would have the print of the first portrait in the background, the third portrait would have the second portrait in the background (which included the first portrait in its background) and so on until infinity … I stopped at four.
I AM STILL ALIVE
https://www.facebook.com/SusakPress/posts/10216939095612021